Connect adenin's dashbaord to IntelliEnterprise
You can use Digital Assistant alongside your existing IntelliEnterprise Intranet Suite installation. Follow the instructions below to connect your Adenin Personal Dashboard to IntelliEnterprise intranet.
Create Connector
To add a Connector to IntelliEnterprise navigate to Content Manager - Service Connectors - Create New Connector. On the following page enter these details:
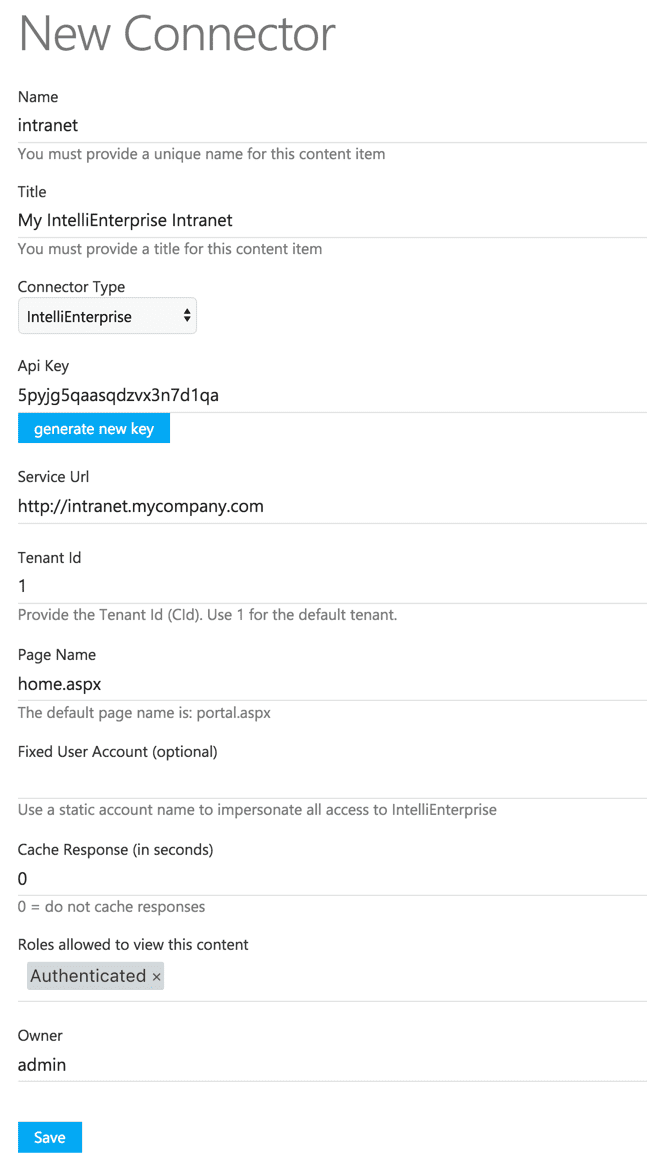
- Name
- Enter a unique technical name for this Connector. This will be used repeatedly on the next page.
- Title
- Enter a title for this Connector
- Connectory Type
- Pick IntelliEnterprise
- Api Key
- Enter or generate an Api Key (shared secret), which will be needed in the next step
- Service Url
- Is the URL of your IntelliEnterprise site
- Tenant Id
- The Company Id of your installation, this is usually 1 by default
- Page Name
- The page name of the home page, usually portal.aspx
- Fixed User Account
- Use this to impersonate all requests made to IntelliEnterprise as one user (less secure)
- Cache response
- Leave at 0
- Roles allowed to view this content
- Allows you to define which roles of Workplace Manager users will be technically allowed to be shown data coming from this Connector
So for the example above the line would be <add key="authProxies" value="1=5pyjg5qaasqdzvx3n7d1qa" />